

Ultimate Gym Flooring Guide 2026
After 15+ years outfitting gyms across the UK, we've distilled everything you need to know about selecting, installing, and maintaining gym flooring into this comprehensive 2026 guide.
Why Gym Flooring Matters More Than You Think
Gym flooring is the foundation of every successful training facility—literally and figuratively. The right flooring protects your subfloor from damage, cushions joints during high-impact activities, reduces noise transmission to neighbours, and creates the professional environment that motivates consistent training. The wrong flooring leads to premature equipment damage, concrete cracking, noise complaints, and the costly expense of replacement.
Over 15 years in the gym flooring industry, we've witnessed countless gym owners make preventable mistakes: under-specifying thickness for their training style, choosing inappropriate materials for their environment, skipping critical installation steps, or neglecting simple maintenance that would triple flooring lifespan. This guide eliminates those risks with expert insights from thousands of successful installations across the UK.
Whether you're building a £500 garage gym, outfitting a commercial facility, or creating a specialized CrossFit box, the principles of effective gym flooring remain constant: match materials to your training demands, install properly the first time, and maintain conscientiously for decades of reliable performance. This comprehensive guide walks you through every decision point with practical, tested advice.
Types of Gym Flooring: Complete Comparison
Rubber Tiles: The Versatile Standard
Rubber gym tiles dominate both home and commercial installations for excellent reasons. The modular design allows DIY installation without adhesive, individual tile replacement when damaged, and flexible layouts that adapt as your gym evolves. Interlocking edges create tight seams that prevent debris accumulation while maintaining easy disassembly if you relocate.
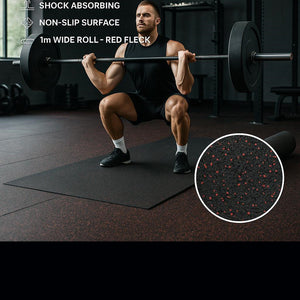
From a performance standpoint, quality rubber tiles deliver professional-grade shock absorption, effective noise reduction, and exceptional durability. The material properties of rubber—high elasticity, excellent wear resistance, and natural grip—make it ideally suited for gym environments. Temperature resilience allows use in unheated garages and outdoor covered areas where other materials would fail.
Best for: Home gyms, garage gyms, small commercial facilities, spaces requiring flexible layouts, rental properties (removable without damage), and DIY installations.
Thickness options: 10mm (yoga/Pilates), 15mm (home gyms), 20mm (commercial/heavy lifting), 25-30mm (Olympic lifting/CrossFit).
Rubber Rolls: Seamless Professional Appearance
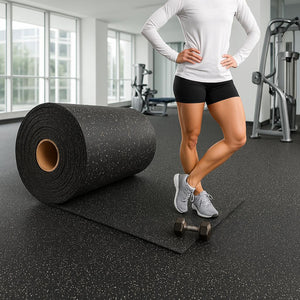
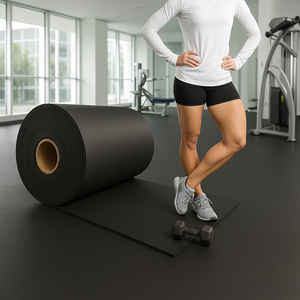
Rubber rolls create the seamless, professional look preferred by commercial facilities and design-conscious gym owners. The continuous surface minimizes seams where dirt and bacteria can accumulate, simplifying cleaning and improving hygiene. Installation efficiency makes rolls ideal for covering large spaces quickly, though professional installation is recommended for optimal results.
The primary trade-off with rolled rubber is permanent installation when adhesive is used. This suits commercial facilities or dedicated home gyms but lacks the flexibility of tiles for renters or those who may relocate. The heavy rolls (25-40kg) also make solo DIY installation challenging compared to manageable individual tiles.
Best for: Commercial gyms, large facilities (40+ sqm), permanent installations, spaces prioritizing seamless appearance, and professional gym environments.
Rubber Mats: Budget Entry Point
Rubber gym mats like 3/4" horse stall mats offer the most economical gym flooring option at £10-18 per sqm. For basic garage gyms with tight budgets, these heavy-duty mats provide adequate protection and durability. However, significant drawbacks include strong rubber odour lasting weeks or months, inconsistent sizing requiring gap filling, heavy individual weight making installation strenuous, and visible seams that detract from appearance.
Our expert installers generally recommend investing the additional £5-10 per sqm for proper interlocking tiles rather than compromising with basic mats. The improved experience, easier installation, better aesthetics, and reduced odour justify the modest premium for most applications.
Best for: Minimal budgets, temporary installations, utility spaces where appearance isn't critical, and users with high odour tolerance.
Specialty Flooring Options
EVA Foam Tiles: Lightweight and inexpensive, EVA foam suits dedicated yoga studios, children's play gyms, and light stretching areas. The soft cushioning feels comfortable for floor exercises but lacks durability for weight training or high-impact activities.
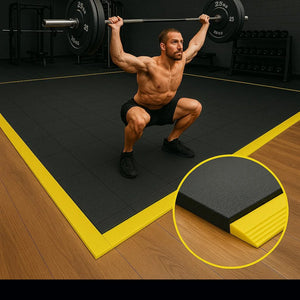
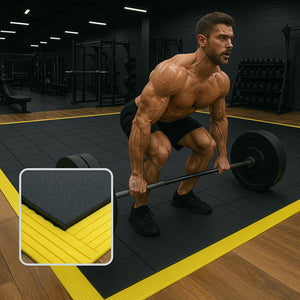
Weightlifting Platforms: Dedicated platforms combine rubber flooring with wood inserts, creating optimal surfaces for Olympic lifting. The wood provides the proper barbell bounce while rubber edges protect surrounding floors from drops.
Turf Areas: Artificial turf sections create designated zones for sled pushing, agility drills, and functional training. These specialized areas complement primary rubber flooring in comprehensive facilities.
Choosing the Right Thickness: Science-Based Selection
Gym flooring thickness directly determines shock absorption capacity, noise reduction effectiveness, durability under load, and long-term lifespan. Understanding the relationship between thickness and performance prevents costly under-specification or wasteful over-specification.
10mm: Light Activities Only
The minimal 10mm thickness provides 40-50% shock absorption—sufficient only for yoga, Pilates, light cardio, and bodyweight training. Any free weight training, equipment drops, or high-impact plyometrics will cause rapid compression damage and premature failure. Use 10mm exclusively in dedicated low-impact zones where its minimal height change and lower cost make sense.
15mm: The Home Gym Sweet Spot
For home gym owners, 15mm thickness represents the optimal balance across all considerations. The 55-65% shock absorption handles dumbbells to 40kg with controlled placement, barbells to 100kg with careful lowering, all cardio equipment, and moderate plyometrics. Noise reduction reaches 40-50% compared to bare concrete—adequate for most residential settings.
The 15mm profile maintains excellent equipment stability, fits under most doorways without modification, remains fully DIY-installable, and costs £20-30 per sqm. With proper use, expect 10-15 year lifespan. Approximately 60% of our home gym customers select 15mm after understanding their options—it handles typical training without limitation while remaining budget-friendly.
20mm: Commercial-Grade Performance
When training intensity escalates beyond typical home gym use, 20mm thickness becomes the minimum recommendation. The 70-80% shock absorption handles barbell drops from waist height, powerlifting training, commercial facilities with multiple daily users, and serious strength-focused programs. Noise reduction jumps to 60-70%—critical for basement gyms, multi-story buildings, and noise-sensitive locations.
The 25-35% cost premium over 15mm (£25-38 vs. £20-30 per sqm) delivers meaningful performance gains for heavy training. Extended lifespan (12-18 years vs. 10-15) often justifies the investment through superior total cost of ownership.
25-30mm: Maximum Protection
The heaviest thicknesses (25-30mm) provide 80-90% shock absorption for the most demanding applications: Olympic barbell drops from overhead, CrossFit boxes with intensive programming, elite athlete facilities, and spaces requiring maximum building protection. The 70-85% noise reduction allows intense training in virtually any building without excessive complaints.
At £30-55 per sqm, these options represent significant investment. However, for facilities where barbell drops from overhead occur routinely, proper thickness isn't optional overhead—it's essential infrastructure that prevents far costlier floor damage and premature replacement.
Cost Breakdown: Realistic Budgeting
Material Costs by Thickness (per sqm)
- 10mm tiles: £15-22
- 15mm tiles: £20-30
- 20mm tiles: £25-38
- 25mm tiles: £30-45
- 30mm tiles: £35-55
Complete Project Costs (20 sqm home gym)
Budget Build (£400-550):
- 22 sqm 15mm recycled rubber tiles @ £18-22/sqm = £360-440
- Tools (if needed): £30-50
- Accessories: £10-30
Quality Build (£600-850):
- 22 sqm 15mm virgin rubber tiles @ £24-30/sqm = £520-660
- Quality tools: £40-70
- Accessories and improvements: £40-120
Premium Build (£800-1,200):
- 22 sqm 20mm commercial tiles @ £30-38/sqm = £660-836
- Complete tool kit: £60-90
- Vapor barrier, acoustic underlayment, professional touches: £80-274
Installation Costs
DIY: Your time (4-6 hours) + £30-90 tools = essentially free for most homeowners willing to invest a weekend afternoon.
Professional: £8-15 per sqm for basic interlocking tile installation. 20 sqm = £160-300 labour. We recommend DIY for standard home gyms—the installation is straightforward and professional labour doesn't add significant value for simple layouts.
Long-Term Value Analysis
Calculate cost per year of use, not just initial purchase price. Quality 15mm flooring at £600 material cost lasting 12 years = £50/year. Budget flooring at £400 lasting 7 years = £57/year. The math often favours quality options despite higher upfront investment.
Installation Essentials: DIY Success
Subfloor Preparation
Proper subfloor preparation determines long-term flooring performance. Sweep and vacuum concrete thoroughly—even small debris creates bumps that telegraph through flooring. Patch cracks wider than 3mm with concrete filler. Check moisture by taping plastic sheeting to floor for 24 hours; condensation underneath indicates moisture issues requiring vapor barrier.
For new concrete, allow minimum 28 days curing before installation. Moisture content must drop below 4% for optimal results. Clean oil stains with degreaser if using adhesive installation. Ensure reasonable levelness—variations under 5mm per meter are acceptable for rubber flooring.
Layout Planning
Map your installation before starting. Determine starting corner (typically furthest from door), establish reference lines using chalk or laser level, and plan border tile cuts to avoid very narrow pieces (under 100mm wide). Order 5-10% extra material for cutting waste and future repairs.
Installation Process
For Interlocking Tiles:
- Start in chosen corner, connect first row tightly
- Build out row by row, checking alignment every 3-4 rows
- Use rubber mallet to seat connections firmly
- Measure border tiles individually (walls rarely perfectly parallel)
- Cut with sharp utility knife using straight edge guide
- Maintain 5-10mm expansion gap at walls
- Install transition strips at doorways
A typical 20 sqm home gym installation takes 3-5 hours for first-timers, 2-3 hours with experience. Allow 24 hours for flooring to acclimate and seams to seat fully before heavy use.
Common Installation Mistakes
- Skipping subfloor cleaning (debris creates permanent bumps)
- Ignoring moisture issues (causes adhesive failure and mould)
- Misaligning early rows (accumulates to major problems)
- Cutting border tiles without individual measurement
- Forcing tiles together (damages interlocking edges)
- Installing over damp concrete
Maintenance Guide: Maximizing Lifespan
Daily Care
Sweep or dust mop after intense workouts to remove dirt, chalk, and debris. This simple task prevents abrasive particles from grinding into the surface, which causes premature wear. Commercial facilities should sweep 2-3 times daily during peak hours.
Weekly Deep Cleaning
Mop with pH-neutral cleaner and damp (not soaking) mop. Avoid harsh chemicals, bleach, or acidic cleaners that degrade rubber compounds. A simple mixture of mild dish soap and water works excellently for home gyms. Rinse thoroughly to prevent detergent residue buildup.
Monthly Maintenance
Inspect high-traffic areas and seams for damage or separation. Check under heavy equipment for compression marks. Address issues promptly before they worsen. Move equipment periodically to prevent permanent compression in high-load areas.
Periodic Care
Every 3-6 months, consider applying rubber floor protectant products. These restore lustre, enhance slip resistance, and provide additional protection against wear and staining. For commercial facilities where appearance affects member perception, regular protectant application maintains professional presentation.
Extending Lifespan
- Use equipment mats under heavy machinery for extra protection
- Install additional drop mats in dedicated lifting zones
- Enforce shoe policies (clean athletic shoes, no street shoes)
- Address spills and stains immediately
- Rotate equipment placement to distribute wear
- Replace individual damaged tiles promptly
With proper maintenance, quality rubber flooring serves 15-20 years in home gyms and 10-15 years in commercial facilities. The modest investment in regular care protects your substantial flooring investment.
10 Common Gym Flooring Mistakes to Avoid
- Choosing thickness based on cost alone: Under-specification leads to premature replacement costing far more than proper initial investment
- Ignoring noise reduction requirements: Inadequate thickness causes neighbour complaints and potential training restrictions
- Skipping subfloor preparation: Poor preparation creates problems that worsen over time
- Not accounting for training progression: Select thickness for future intensity, not current light use
- Installing over moisture issues: Trapped moisture causes mould, odours, and adhesive failure
- Cutting expansion gaps: Rubber expands/contracts with temperature—gaps prevent buckling
- Using inappropriate cleaning products: Harsh chemicals degrade rubber compounds
- Neglecting regular maintenance: Simple care extends lifespan dramatically
- Choosing wrong format: Tiles vs. rolls vs. mats—each suits specific applications
- Installing in extreme temperatures: Rubber should acclimate to installation temperature for 24 hours
Frequently Asked Questions
What is the best type of gym flooring?
Rubber flooring is the best choice for gyms. It provides superior shock absorption, noise reduction, durability, and low maintenance. For home gyms, 15mm interlocking rubber tiles offer the best balance of performance and value. Commercial facilities typically use 20mm rolled rubber or tiles.
How thick should gym flooring be?
Thickness depends on use: 10mm for yoga/Pilates, 15mm for home gyms with moderate weights, 20mm for heavy lifting and commercial gyms, 25-30mm for Olympic lifting and CrossFit. Most home gyms choose 15mm as the optimal balance.
Can I install gym flooring myself?
Yes, interlocking rubber tiles are designed for DIY installation. A typical home gym (20 sqm) takes 2-4 hours to install with basic tools. Rolled rubber may require professional installation for best results.
How much does gym flooring cost in the UK?
Expect £15-55 per sqm depending on thickness and quality: 10mm tiles £15-22, 15mm tiles £20-30, 20mm tiles £25-38, 25mm tiles £30-45, 30mm tiles £35-55. A typical 20 sqm home gym costs £400-900 for materials.
What is the lifespan of rubber gym flooring?
Quality rubber gym flooring lasts 10-20 years in home gyms and 7-15 years in commercial facilities with proper maintenance. Lifespan depends on thickness, usage intensity, and maintenance quality.
Building Your Perfect Training Foundation
Gym flooring represents one of the most important investments in your training facility—it protects your subfloor, equipment, and joints while creating the professional environment that motivates consistent effort. The insights in this comprehensive guide eliminate the guesswork and costly mistakes that plague first-time gym builders.
Remember the key principles: match flooring type and thickness to your actual training intensity, invest in proper installation from day one, maintain conscientiously for maximum lifespan, and calculate total cost of ownership rather than focusing solely on initial price. Whether you're building a modest home gym or outfitting a commercial facility, these fundamentals ensure optimal performance for decades.
Ready to select perfect flooring for your gym? Browse our complete gym flooring collection or contact our expert team for personalized recommendations based on your specific training requirements, space constraints, and budget.

