






Garage Gym Flooring Setup: Complete DIY Checklist
Garage Gym Flooring Setup: Complete Checklist
Converting your garage into a functional home gym starts with proper flooring. This complete checklist ensures DIY success from planning through installation.
Planning Your Garage Gym: First Steps
Measure Your Space Accurately
Begin by measuring your garage precisely. Typical dimensions:
- Single garage: 3.0-3.6m wide × 5.5-6.5m deep (18-23 sqm)
- Double garage: 6.0-7.0m wide × 5.5-6.5m deep (36-45 sqm)
Don't assume standard dimensions—actual measurements often vary by 0.3-0.5m. Measure in multiple places as walls may not be perfectly parallel.
Critical measurements:
- Overall length and width
- Obstacles (water heaters, electrical panels, stairs)
- Floor-to-ceiling height (for pull-up bars)
- Door opening width (for equipment delivery)
- Distance from garage to living spaces (noise consideration)
Assess Your Concrete Condition
Inspection checklist:
- Cracks: Hairline (<3mm) acceptable; wider cracks need patching
- Levelness: Variations under 5mm/meter acceptable
- Moisture: Tape plastic sheet for 24 hours—condensation indicates moisture issues
- Oil stains: Clean with degreaser before installation
- Flaking: Remove loose concrete and patch
- Slope: Up to 2% slope (20mm/meter) acceptable
Determine Your Training Style
Match flooring thickness to your most intense training:
- Light: Cardio, yoga, bodyweight → 10mm (but 15mm recommended)
- Moderate: Dumbbells to 40kg, standard barbell work → 15mm ideal
- Heavy: Powerlifting, heavy barbells → 20mm minimum
- Intense: CrossFit, Olympic lifting → 25mm recommended
Garage Gym Flooring Options
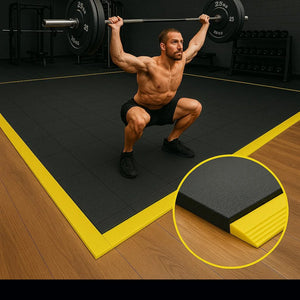
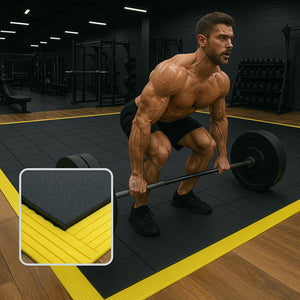
Interlocking Rubber Tiles (Recommended)
Interlocking rubber tiles are the garage gym standard for excellent reasons:
Advantages:
- No adhesive required (reversible, rental-friendly)
- Temperature tolerant (cold winters, hot summers)
- Easy individual tile replacement
- Expandable as gym grows
- Portable if you move
- Cost-effective: £18-32/sqm, DIY installation
Recommended thickness: 15mm for general use, 20mm for heavy lifting.
Rolled Rubber
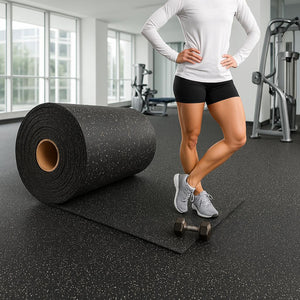
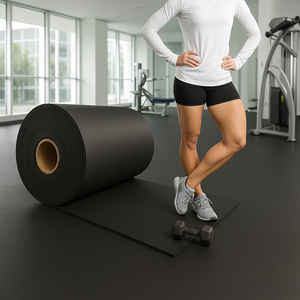
Creates seamless appearance but requires adhesive installation. Best for larger double/triple garages (40+ sqm) with permanent setup. Heavy rolls (25-40kg) make solo DIY difficult.
Rubber Mats
Budget option (£10-18/sqm) but drawbacks include strong odour, inconsistent sizing, heavy weight (30-35kg per mat), and poor aesthetics. Quality tiles worth the extra £5-10/sqm.
Zoning Strategy (Cost-Effective)
- Cardio zone: 10mm tiles (£15-22/sqm)
- General training: 15mm tiles (£20-30/sqm)
- Heavy lifting: 20mm tiles (£25-38/sqm)
Saves £100-200 while ensuring adequate protection where needed. Use transition strips between zones.
Step-by-Step Installation: DIY Success
Step 1: Prepare Floor (30-60 minutes)
Clean thoroughly: Sweep entire floor, vacuum corners. If oil stains present, clean with degreaser and allow 24 hours to dry.
Repair damage: Fill cracks wider than 3mm with concrete patching compound. Smooth with trowel, allow 2-4 hours to cure. Remove loose/flaking concrete.
Check moisture: Ensure completely dry. If moisture issues detected, install 6-mil polyethylene vapor barrier with 300mm overlaps.
Step 2: Plan Layout (20-30 minutes)
Starting point: Begin in corner furthest from garage door. For visible areas, start from most visible corner for symmetry.
Dry lay borders: Lay one row along each wall to determine border tile width. Adjust to avoid narrow cuts (<100mm wide). Ideal borders are 200mm+ wide.
Mark reference lines: Snap chalk lines or use laser level for square installation. Misalignment accumulates over large areas.
Step 3: Install Full Tiles (1-2 hours for 20 sqm)
- Connect first row using interlocking edges—male into female
- Apply firm pressure, use rubber mallet to seat fully
- Build row by row, working away from starting corner
- Check alignment every 3-4 rows against chalk lines
- Use gentle but firm mallet taps (don't hammer aggressively)
Step 4: Cut Border Tiles (30-45 minutes)
Measure individually: Garage walls rarely parallel—measure each border tile separately. Account for 5-10mm expansion gap at walls.
Cutting technique: Sharp utility knife with fresh blades. Score deeply along straight edge, flip and score back, flex to snap. For 20mm+ tiles, multiple passes needed. Heavy-duty scissors for final trimming.
Preserve interlocking edges: Cut from straight edge opposite interlocking side when possible.
Step 5: Finishing (30-45 minutes)
Expansion gaps: Leave 5-10mm gaps at walls. Rubber expands/contracts with temperature—prevents buckling.
Final inspection: Walk entire floor checking gaps, misalignments, loose tiles. Reseat any non-flush connections. Vacuum debris, wipe with damp cloth.
Step 6: Acclimation (24 hours)
Allow 24 hours for rubber to settle and seams to seat fully. For first week, avoid dragging extremely heavy equipment—lift and place to prevent pulling seams.
Noise Reduction: Keep the Peace
Flooring-Based Reduction
Thickness is primary noise control:
- 15mm: 40-50% reduction vs. bare concrete
- 20mm: 60-70% reduction
- 25mm: 70-80% reduction
For attached garages with bedrooms above, we strongly recommend minimum 20mm for serious weight training.
Supplementary Strategies
Dropping zones: Install additional 25-30mm crash pads in designated barbell drop areas. Reduces drop noise by 80-90%.
Equipment padding: Place extra mats under rowing machines, treadmills, assault bikes—isolates vibration.
Behavioral adjustments: Control barbell descent when possible, place dumbbells down (not drop), avoid late-night training (post-22:00), use hex dumbbells.
Structural Improvements
Garage door weatherstripping: Install on all four sides—reduces exterior noise by 20-30%.
Wall treatment: Acoustic panels on shared walls provide 15-25% additional dampening.
Time restrictions: Most neighbours tolerate 09:00-20:00 training but object to early/late disturbances.
Budget Breakdown: True Costs
Single-Car Garage (18 sqm)
Budget (£360-450):
- 20 sqm 15mm recycled tiles @ £18-22/sqm = £320-400
- Tools: £25-35
- Accessories: £15-25
Quality (£540-720):
- 20 sqm 15mm virgin rubber @ £24-30/sqm = £480-600
- Quality tools: £40-60
- Accessories: £20-40
Premium (£720-960):
- 20 sqm 20mm commercial @ £30-38/sqm = £600-760
- Complete kit: £50-70
- Vapor barrier, underlayment: £70-130
DIY vs. Professional
DIY: Your time (4-6 hours) + £30-70 tools = essentially free
Professional: £8-15/sqm installation. Single garage = £144-270 labour. We recommend DIY for standard layouts under 50 sqm.
Long-Term Value
Quality 15mm at £600 lasting 12 years = £50/year. Budget alternative at £400 lasting 7 years = £57/year. Math often favours quality.
Tools & Accessories Checklist
Essential (Required)
- Tape measure (5m+): £8-15
- Sharp utility knife: £10-20
- Straight edge (1m+): £12-25
- Rubber mallet: £12-20
- Chalk line or laser level: £15-45
- Broom and vacuum: (likely owned)
Recommended
- Heavy-duty scissors: £15-25
- Work gloves: £8-15
- Knee pads: £15-30
- Extra knife blades: £5-10
- Speed square: £10-18
Materials
- Rubber flooring tiles (order 5-10% extra)
- Concrete patching compound: £10-20
- Vapor barrier (if needed): £20-40
- Transition strips: £15-30 each
- Concrete degreaser: £10-18
- pH-neutral cleaner: £8-15
Total tool investment: £80-150. These remain useful for future projects.
Frequently Asked Questions
What is the best flooring for a garage gym?
15mm interlocking rubber tiles are best for garage gyms. They're DIY-friendly, require no adhesive, handle temperature fluctuations, and provide excellent shock absorption for £20-30/sqm.
Can I install garage gym flooring myself?
Yes, interlocking rubber tiles are designed for DIY installation. A single-car garage (18 sqm) takes 2-3 hours with basic tools: tape measure, utility knife, straight edge, and rubber mallet.
How much does garage gym flooring cost?
Budget £360-900 for a single-car garage (18 sqm): £320-540 for materials, £30-50 for tools, £10-30 for accessories. DIY installation adds zero labour cost.
How do I reduce noise in my garage gym?
Use minimum 15mm flooring (20mm for heavy weights), add extra mats in dropping zones, install weatherstripping on garage door, and avoid late-night training. 20mm flooring provides 60-70% noise reduction.
Can I install over cracked concrete?
Minor cracks (<3mm) are fine—flooring bridges them. Larger cracks need concrete patching compound. Severe structural damage requires professional repair first.
Should I use tiles or rolled rubber?
For garages under 50 sqm, tiles are superior: easier DIY installation, individual replacement if damaged, no adhesive needed, portable if you move.
Building Your Perfect Garage Gym
Creating a functional garage gym requires thoughtful planning, quality materials, and attention to installation details—but it's entirely achievable for DIY homeowners. Proper flooring transforms cold concrete into a professional training environment.
Key principles: measure carefully, select thickness matching your intensity plus one level if noise concerns exist, prepare concrete properly, take time with installation for tight seams, and maintain regularly for 15-20 year lifespan.
Ready to build your dream garage gym? Browse our garage gym flooring collection or contact our expert team for personalized recommendations.
