




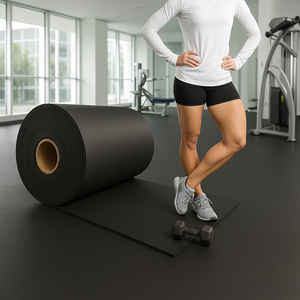


10 Common Gym Flooring Mistakes to Avoid
10 Common Gym Flooring Mistakes to Avoid
After 15+ years outfitting gyms across the UK, we've seen the same costly mistakes repeated hundreds of times. This guide helps you avoid them.
Why This Guide Exists
Over 15 years in the gym flooring industry, we've witnessed countless gym owners make preventable mistakes that cost thousands in premature replacements, repairs, and lost training time. The frustrating part? Most of these errors stem from simple oversights or misinformation that proper guidance eliminates entirely.
This guide compiles the 10 most common—and costliest—gym flooring mistakes we encounter, along with practical solutions that ensure your flooring investment delivers decades of reliable performance. Whether you're building your first home gym or outfitting a commercial facility, these insights save you money, time, and frustration.
Mistake #1: Under-Specifying Thickness to Save Money
The error: Choosing 10mm flooring to save £5-8 per sqm, then replacing it within 24 months when compression damage becomes severe under weight training.
Real-world cost: A £200 material saving becomes a £1,500 loss when you must remove damaged flooring, dispose of it, purchase replacement flooring, and reinstall. Plus lost training time during replacement.
Why it happens: Initial price comparison focuses on material cost alone, ignoring lifespan and replacement frequency. A £20/sqm option seems much better than £28/sqm—until you realize the budget option lasts 7 years while quality lasts 15 years.
The solution: Calculate total cost of ownership, not initial price. Quality 15mm flooring at £600 lasting 12 years = £50 per year. Budget alternative at £400 lasting 7 years = £57 per year. The math often favours quality despite higher upfront cost.
Expert tip: Match thickness to your most intense training activity, not average workout intensity. Plan for progression—select thickness for where you'll be in 2 years, not current training level.
Mistake #2: Ignoring Noise Reduction Requirements
The error: Selecting flooring based solely on shock absorption needs, then facing neighbour complaints, household disruption, or cease-and-desist orders from local authorities.
Real-world cost: Beyond relationship damage with neighbours, noise violations can lead to forced gym relocation, training time restrictions, or legal action—far more costly than proper initial specification.
Why it happens: Gym owners in apartments, townhouses, or shared walls underestimate sound transmission. A 15mm floor that's adequate for shock absorption may generate unacceptable noise.
The solution: If noise is a concern, upgrade at least one thickness level beyond your training requirements. For apartment gyms or attached garages with bedrooms above, we strongly recommend minimum 20mm thickness for weight training.
Noise reduction by thickness:
- 15mm: 40-50% reduction vs. bare concrete
- 20mm: 60-70% reduction
- 25mm: 70-80% reduction
Expert tip: Combine proper thickness with supplementary strategies—weatherstripping garage doors, acoustic panels on shared walls, and designated heavy-lifting zones with extra protection.
Mistake #3: Skipping Subfloor Preparation
The error: Installing flooring over dirty, damaged, or unrepaired concrete because "the rubber will hide it."
Real-world cost: Debris creates permanent bumps that worsen over time. Unpatched cracks widen and telegraph through flooring. Oil stains prevent adhesive bonding. Moisture causes mould growth and adhesive failure.
Why it happens: Preparation seems like unnecessary extra work when you're eager to start training. The rubber flooring does hide problems initially—but they emerge and worsen within months.
The solution: Invest 2-3 hours in proper preparation:
- Sweep and vacuum thoroughly—even small debris matters
- Patch cracks wider than 3mm with concrete filler
- Test for moisture (tape plastic sheet for 24 hours)
- Clean oil stains with degreaser (allow 24 hours drying)
- Remove loose or flaking concrete
- Install vapor barrier if moisture detected
Expert tip: For new concrete, allow minimum 28 days curing before installation. Moisture content must drop below 4% for optimal adhesive performance.
Mistake #4: Not Planning for Training Progression
The error: Selecting 15mm flooring for current light training, then expanding into heavy powerlifting within 12 months. The flooring that seemed adequate now shows premature compression and damage.
Real-world cost: Complete floor removal and reinstallation costs £800-1,500 for typical home gym, versus the £150-250 additional investment in proper initial thickness.
Why it happens: Beginners naturally focus on current training needs, not future progression. The thought "I'll upgrade if I get serious" seems reasonable—until you realize upgrading means complete replacement.
The solution: If there's any chance you'll progress to heavier loads, invest in appropriate thickness now. Ask yourself: "Could I be doing heavy barbell work in 2 years?" If yes, specify for that intensity today.
Expert tip: It's better to slightly over-specify thickness than under-specify. Excess thickness doesn't harm performance, while insufficient thickness causes premature failure.
Mistake #5: Installing Over Moisture Problems
The error: Ignoring moisture test results showing damp concrete, installing flooring anyway, then dealing with mould growth, foul odours, and adhesive failure.
Real-world cost: Mould remediation can cost £500-2,000+ depending on severity. Plus flooring removal and replacement. Health risks from mould exposure add to the problem.
Why it happens: Addressing moisture seems expensive and time-consuming. The temptation to "just install and see what happens" is strong—but moisture problems always worsen, never improve.
The solution: Test for moisture before installation. Tape 1m x 1m plastic sheet to floor for 24 hours. Condensation underneath indicates moisture issues requiring vapor barrier installation or concrete sealing.
Vapor barrier installation: Install 6-mil polyethylene sheeting with 300mm overlaps, tape seams with waterproof tape. This simple step prevents moisture migration and costs only £20-40 for typical home gym.
Expert tip: Basements and below-grade spaces are particularly prone to moisture. Always test these locations even if concrete appears dry.
Mistake #6: Choosing Wrong Format for Application
The error: Purchasing rolled rubber for a small home gym (difficult DIY installation) or interlocking tiles for a 200 sqm commercial facility (inefficient coverage).
Real-world cost: Professional installation of rolled rubber when tiles would have been DIY-friendly adds £300-800 labour cost. Conversely, excessive seams from tiles in large commercial spaces create cleaning challenges and aesthetic issues.
Why it happens: Focusing on one factor (price, appearance, or ease) without considering the complete picture.
The solution: Match format to application:
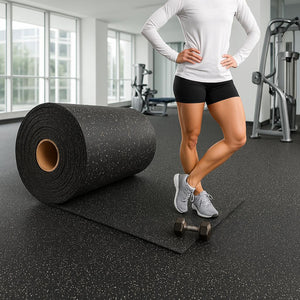
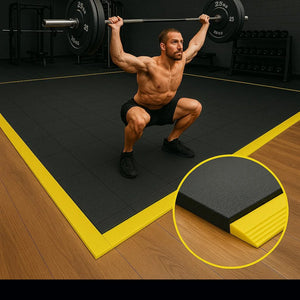
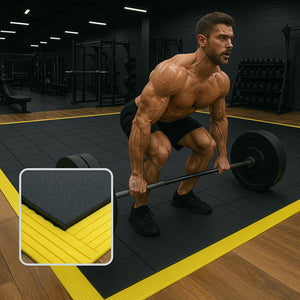
- Interlocking tiles: Home gyms, garages, small commercial (<50 sqm), DIY installation, rental properties
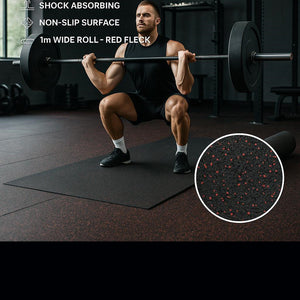
- Rolled rubber: Large facilities (40+ sqm), permanent installation, commercial gyms, professional appearance priority
- Rubber mats: Minimal budgets, temporary setups, utility spaces only
Expert tip: For spaces 20-50 sqm, tiles and rolls both work—choose based on installation preference (DIY vs. professional) and permanence requirements.
Mistake #7: Neglecting Expansion Gaps
The error: Installing flooring tight against walls without expansion gaps, then dealing with buckling when rubber expands in summer heat.
Real-world cost: Buckled flooring creates trip hazards, damages interlocking edges, and may require complete reinstallation to correct. Plus safety risks from uneven surfaces.
Why it happens: The 5-10mm gap seems wasteful when you're trying to maximize coverage. Installers don't realize rubber expands and contracts significantly with temperature changes.
The solution: Always leave 5-10mm expansion gaps between flooring and walls. The gap will be hidden by baseboards or wall-mounted equipment. This simple allowance prevents buckling and extends flooring lifespan.
Expert tip: For very large installations (>100 sqm), consult manufacturer recommendations for expansion joints within the field—not just perimeter gaps.
Mistake #8: Using Inappropriate Cleaning Products
The error: Cleaning rubber flooring with bleach, harsh chemicals, or acidic cleaners that degrade rubber compounds and shorten lifespan by years.
Real-world cost: Chemical damage is irreversible. Degraded rubber becomes brittle, cracks develop, and replacement becomes necessary years before normal lifespan.
Why it happens: General-purpose cleaners that work on other surfaces seem fine for gym flooring. The damage occurs gradually and isn't immediately obvious—but it accumulates.
The solution: Use only pH-neutral cleaners specifically approved for rubber flooring. A simple mixture of mild dish soap and water works excellently for home gyms. Avoid:
- Bleach (degrades rubber compounds)
- Acidic cleaners (vinegar, citrus-based products)
- Harsh degreasers (except during initial subfloor prep)
- Abrasive scrubbers (damage surface texture)
Expert tip: Test any new cleaning product on a small, inconspicuous area first. If it causes discolouration or texture changes, don't use it.
Mistake #9: Ignoring Manufacturer Acclimation Guidelines
The error: Installing flooring immediately after delivery from cold storage without allowing temperature acclimation, resulting in excessive curl, difficult installation, and potential seam issues.
Real-world cost: Forced installation of non-acclimated flooring causes gaps at seams that never properly seat, requiring replacement of affected sections.
Why it happens: Excitement to start training overcomes patience. The 24-hour acclimation period seems like unnecessary delay.
The solution: Allow flooring to acclimate to installation temperature for minimum 24 hours before installation. This is particularly critical in UK climates where storage and installation temperatures can vary 15-20°C.
Acclimation process:
- Store flooring in installation space 24 hours minimum
- For rolled rubber, unroll and allow to relax
- For tiles, keep packaged but in final location
- Ensure installation space is at normal operating temperature
Expert tip: Cold flooring is stiffer and harder to work with. Warm flooring is more pliable and seats better. The 24-hour wait makes installation significantly easier.
Mistake #10: Neglecting Regular Maintenance
The error: Installing flooring then ignoring all maintenance, allowing dirt accumulation, stain development, and premature wear that reduces 15-year lifespan to 8-10 years.
Real-world cost: Replacing flooring 5-7 years early costs £600-1,500 for typical home gym. Plus the deteriorated appearance reduces training motivation and facility value.
Why it happens: Rubber flooring seems indestructible. The gradual degradation from neglect isn't immediately obvious—but it accumulates year over year.
The solution: Implement simple maintenance schedule:
Daily: Sweep or dust mop after intense workouts (2 minutes)
Weekly: Mop with pH-neutral cleaner and damp mop (10 minutes)
Monthly: Inspect high-traffic areas and seams, address issues promptly (15 minutes)
Every 3-6 months: Apply rubber floor protectant products (30 minutes)
Expert tip: The cumulative time investment is under 2 hours per year for typical home gym. That minimal effort protects your £600-1,200 investment and extends lifespan by 5-7 years.
Bonus Mistakes: Honourable Mentions
Mistake #11: Assuming All Brands Perform Equally
Not all 15mm flooring performs identically—density and compound quality vary significantly. Budget 15mm from unknown sources may perform like 10mm from quality suppliers. Prioritize density specifications (kg per cubic metre) alongside thickness.
Mistake #12: Installing in Extreme Temperatures
Attempting installation in <10°C or >35°C environments causes adhesive failure, excessive expansion/contraction, and difficult installation. Install in moderate temperatures (15-25°C) for best results.
Mistake #13: Forgetting About Door Clearances
Installing 25-30mm flooring without checking door clearances, then discovering doors won't open or close properly. Measure clearances before ordering thickness.
Mistake #14: Not Ordering Extra Material
Ordering exact coverage with no waste allowance, then running short during border cutting. Always order 5-10% extra for waste and future repairs. Exact colour/batch matching later may be impossible.
Frequently Asked Questions
What is the biggest mistake when choosing gym flooring?
Under-specifying thickness to save money is the costliest mistake. Choosing 10mm to save £5-8/sqm often leads to replacement within 24 months when compression damage becomes severe—a £200 saving becomes a £1,500 loss.
Can I install gym flooring over moisture problems?
No. Installing over moisture causes mould growth, adhesive failure, and foul odours. Always address moisture issues first with vapor barriers or concrete sealing.
Should I choose gym flooring based on price alone?
Never. Calculate total cost of ownership including lifespan and replacement frequency. Quality 15mm at £600 lasting 12 years (£50/year) often beats budget flooring at £400 lasting 7 years (£57/year).
Do I need to prepare my subfloor before installation?
Absolutely. Skipping preparation causes problems that worsen over time. Clean thoroughly, patch cracks, address moisture, and ensure level surface for long-term performance.
Can I fix mistakes after installation?
Some mistakes are fixable (loose tiles can be reseated, individual damaged tiles replaced), but many require complete removal and reinstallation (wrong thickness, moisture issues, inadequate preparation). Prevention is always cheaper than correction.
Learning From Others' Mistakes
The beauty of this guide is that you can learn from thousands of others' costly mistakes without experiencing them yourself. Every error documented here represents real gym owners who faced unexpected expenses, lost training time, and frustration—all from preventable oversights.
The path to successful gym flooring is straightforward: match thickness to your most intense training, prepare your subfloor properly, choose appropriate format for your application, install with attention to detail, and maintain conscientiously. These fundamentals prevent 95% of problems we encounter in the field.
Ready to avoid these mistakes and get it right the first time? Browse our complete gym flooring collection or contact our expert team for personalized guidance based on your specific situation.
